Kona Rigid Steel Fork for Bicycle Touring

This article covers the basics of replacing a typical mountain bike fork with a fork more suitable for bike touring and commuting.
For this bike we are keeping the old fork for times when 80 to 100mm of travel are a nice thing to have. However, for a lighter weight, fast rolling, trail worthy utility bike I like the Kona Project 2 disc compatible fork with fender and rack braze ons.
What is discussed here is getting a proper fit, which consists of establishing two things.
1. Keeping the handlebars level with the seat
2. Having the handlebars align with the front axle as a nice guideline for stability and handling.
Whereas most mountain bikes have the rider leaning considerably forward thereby applying weight and pressure to the front wheel, this method being described aims at a middle way approach. Riding position achieved with these two methods provides a more comfortable, less aggressive riding position while still applying some weight on the front tire for steering traction on trails and other loose terrain.
Selecting the proper fork length measured from center of axle to steering crown is an essential determination in choosing the right fork. Many 26" forks on the market are described as suspension corrected length thus creating a long tall fork that makes the bike look like a chopper. Another common problem is that the fork is made too short requiring the use of several stem spacers to achieve the riding position described which can create a problem with the stem as most quality stem installation instructions will suggest a maximum steer tube length between frame and stem.
Since this build is for a mountain touring bike it's unique in that most mountain bikes fit one of two categories which are cross country or XC and downhill. So, selecting the Kona Project 2 fork which offers a hard to find length of 440mm made the process of determining proper steer tube length to meet our two objectives of riding position very easy.
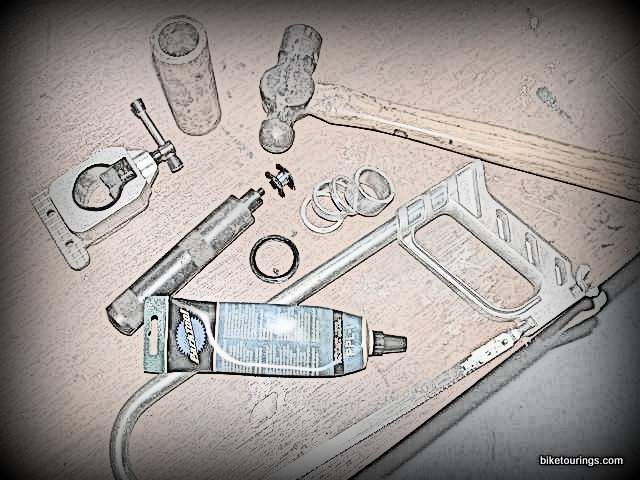
Photo at right of tools necessary to perform proper fork replacement listed in order of usage. Bearing race setter and bearing race, assorted spacers in varying thicknesses, quality hacksaw and cutting guide (Lennox is good stuff), star nut and star nut setting tool and grease.
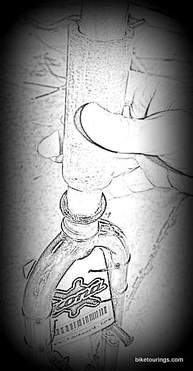 After removing the fork to be replaced, the bottom cup bearings are repacked with grease. After setting the bearing race and checking to ensure it is flush all the way around the fork crown apply a thick coating of grease as shown. Park Polylube is available in a handy tube for easily dispensing grease in bearing cups and on bearing races. 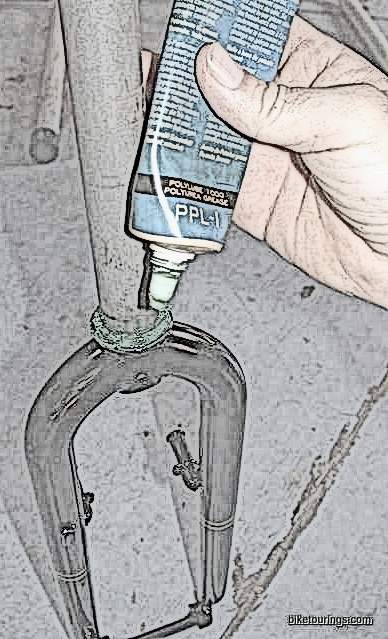 Park Tool PPL-1 squeeze tube for ease of applying grease in precise areas is less messy. 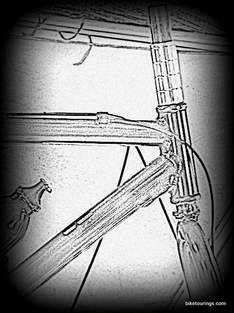 Stacking of spacers for for temporarily setting fork in place to remove bike from stand for determining steer tube cut. Moving the handlebars up and down on the steer tube changes the positioning in relationship to the front axle. Finding that mid way point with handlebars at same height as the saddle was very easy so that the spacers above the stem can be removed and steer tube can be marked just above the stem for cutting.  Carefully marking steer tube for cutting, noting to cut on the inside or stem side of the mark for proper installation of top cap. After marking the steer tube for cutting, gently and carefully removing the fork, setting aside spacers and wiping off grease, placing a very thick heavy duty piece of rubber in the rounded jaws in the lower part of the vice prevents the steer tube from being marred or damaged while being clamped for cutting. Then sliding the cutting guide into place being sure to have the slotted guide on the cut side of the steer tube so that after making the cut the cutting guide does not fall off of the steer tube with the cut piece.  Positioning of star nut with Park Star Nut Setting Tool prior to tapping in to place with large ball peen hammer. 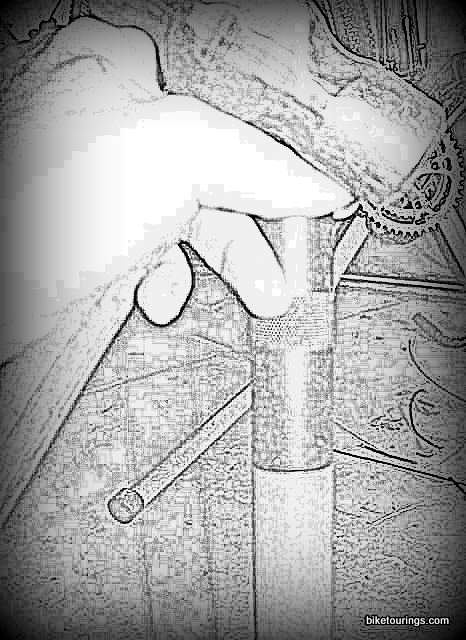 Star nut setting tool shown flush with top of steering tube for proper installation. | Image at left of bearing race being gently set on to base of steer tube then gently tapped into position before using the sliding action of the setting tool which is used to forcibly strike the bearing race into place while allowing the tool to do the work as shown below. Different types of bearing race setting tools are available, this type is a simple, effective and inexpensive tool for getting the job done properly and available from United Bike Supply. 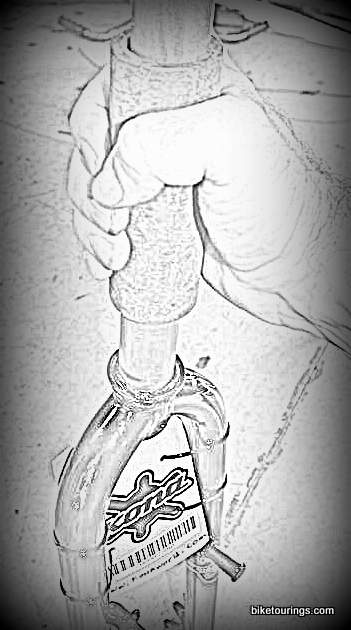 Using race setting tool to set bearing race on fork. 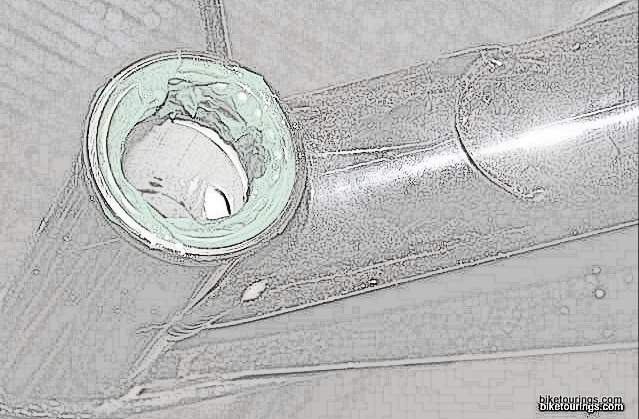 Bearing cup re-packed with bearings and new grease. Next, with grease on bearing race, bottom cup and bearings packed with grease and having the steer tube spacers handy, gently slide the fork through the head tube and spacers. Placing the handlebars and stem into position and tightening into place by pressing the fork snug into place from below. By doing this the wheel can be put on so the bike can be taken out of the stand for proper and accurate fitting. 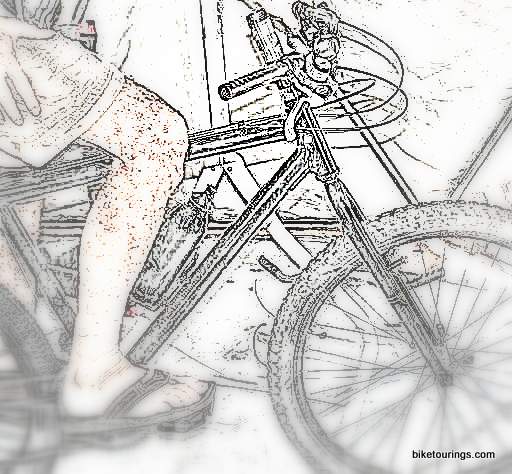 Having the fork temporarily installed without star nut for determining stack height of spacers for cutting steer tube. 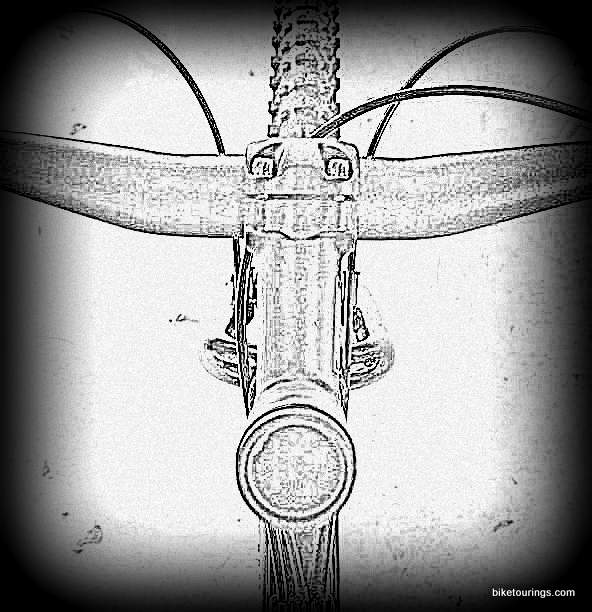 Illustration shows the handlebar to axle alignment while seated on bike with handlebars parallel with saddle 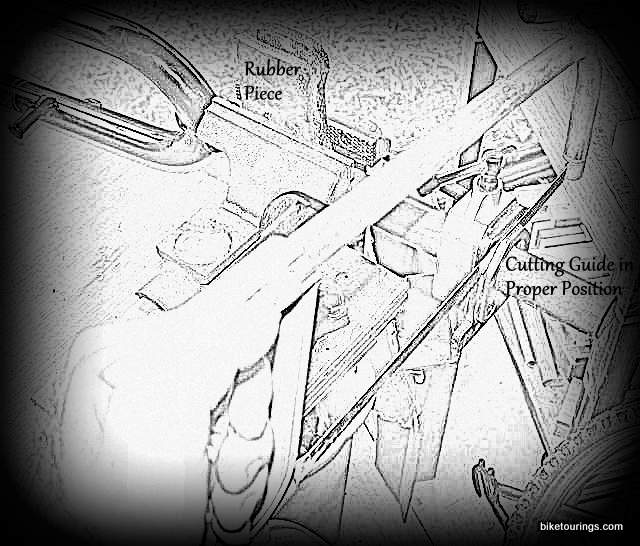 Illustration of proper cutting guide usage and preventing damage to fork steering tube. After cutting steer tube using a small round file or rat tail file to removed burred edges from inside of steering tube and a small flat file for removing burrs on outside of steer tube aids installation and smooth placement of stem and spacers for stack height. When using a quality hack saw blade there should be very little material to remove. Importance of removing burrs from inside steering tube aids in installation of star nut. (Illustration at left) After setting the star nut and checking that the setting tool is flush with the top of the steering tube it is ready to install. By following this simple step by step process fork replacement is an easy task that most anyone can do with the proper tools and know how. So, as discussed here with the proper installation the bike shown below is what we built and we are very pleased with how it rides. It's our new and improved Rigamaroll. Cheers! 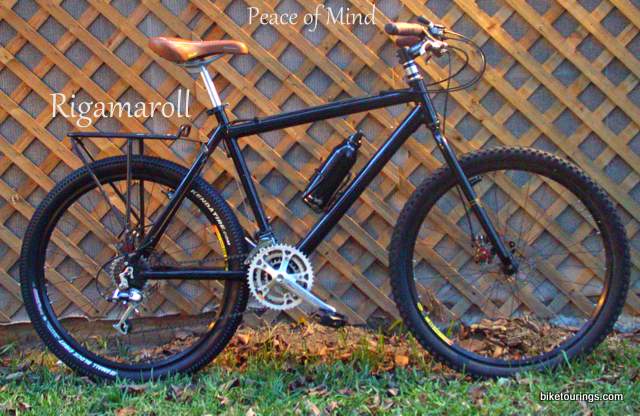 Very pleased with the Rigamaroll's new style and functionality. Cheers! |


 RSS Feed